Wednesday, October 28, 2020

Saucey!


Howdy!

Funny story; at Thanksgiving, Hubby asked for apple sauce to go with our turkey dinner.  Apple sauce?  Where did that come from?  He has never asked for apple sauce before, homemade or otherwise!


Apple sauce is so easy to make - simply boil down apples with cinnamon, brown sugar, white sugar and a little bit of water.  When apples are soft, put the mixture through the food processor until it is smooth!


All joking aside, it took Derek twenty years to ask for apple sauce with his holiday meal... am I really that scary?  hahaha


Jeanette

Tuesday, October 27, 2020

Mystery science

 Hello there!


One of the free/cost effective supports for our homeschool curriculum that I am so happy I found is mystery science .  This site has just about every question and scientific exploration you could possibly think of and it is presented in a fun way with kid friendly follow up activities.

This week is all "Pumpkin School"... Halloween learning and activities.  We started the week out with some monster math questions and then went on to learn a little about our skeletons!  Watching a video about the bones and joints in our hands was followed up by a really cool activity using nothing but crayons and mineral oil to make our very own hand x-rays!  It really was easy and it really worked!


If you are looking to add some fun science to your distance learning or homeschool routine... or if you are just looking for fun with the kiddos.. be sure to check this web site out!
Cheers!

Jeanette

Volcanoes

     Hello!

Okie-dokie, so what elementary science experience DOES NOT include the baking soda-vinegar volcano?


We wrapped up our geology exploration with the construction of a clay volcano model.  We used red food colouring, dish soap, vinegar and baking soda for our eruption and marvel heroes as fleeing villagers.  An added fun element was some Black Sea salt that added a nice sulphur smell when wet.  


For full video, see our Instagram feed.  :)

Until next time,
Jeanette


Saturday, October 10, 2020

Leaves and Chlorophyll

     I love AUTUMN!


    While raking up (and jumping in) leaves earlier this week, my girls and I began chatting about the different colours of the leaves and why they turn the colours they do.  I won't ruin any science exploration you might be thinking of doing but lets just say it includes cooler weather trapping sugars in the leaves of the tree.


    But a handful of trees still wore robes of green - which prompted my girls to try and remember why leaves are green in the first place.  The answer to that is chlorophyll.  This led us to do a quick experiment to find out which leaves had the most chlorophyll.

    We gathered five leaves from five different trees; a walnut tree, a birch tree and three maples (one sugar, one Japanese and one 'regular old maple').

    We then brought the leaves into the kitchen and tore them into small pieces.  We put each pile of leaf pieces into their own glass jar and labeled each jar.  We then poured rubbing alcohol into the jars until the alcohol just covered the leaf pieces.  To help the alcohol take up the green colour of the leaves, I put the glass jars into a tray of hot water and covered the whole thing with Saran Wrap.  After about 15 minutes we replaced the water with fresh hot water and after about 30 minutes, each jar had GREEN rubbing alcohol.


    When the alcohol was green we placed strips of coffee filter into each jar.  Taping the end of the filter to the wall, with just the tip of the filter immersed into the alcohol.  And then we waited.

    After about 90 minutes, the green had travelled up the coffee filter.  We put the coffee filters in an order from least amount of yellow and green to the most amount of green.  This told us which leaves held the most chlorophyll!  Our sugar maple had the most chlorophyll while the oak tree had the least!


    An impromptu (albeit anticlimactic according to Sammy) learning adventure!

Jeanette

Art Class - Wayne Theibaud Lollipops

 Good evening!


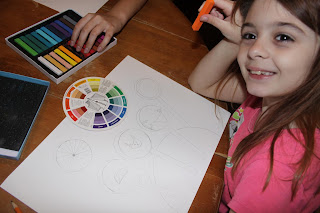
    I believe that the arts - visual art, music and drama are so important for the growth of our children, but art is not something that comes easily to me.  I love to knit and crochet but have difficulty putting colours together and I've never really made friends with a paintbrush.  I wanted to be sure to include some art learning in our homeschool routine.

    Thankfully Pinterest is a treasure trove not only for creative ideas for kids but FREE creative lessons!  Homeschooling through Covid on a budget means free is a wonderful thing!  I came across wonderful sites full of art lessons for elementary and middle school ages!  


Our first art project of the year is a pastel lollipop piece based on the works of Wayne Theibaud.  The lady behind this website, Michelle lays out each art lesson with a little art history/artist background and step by step instructions!


    Using 12 by 18 inch watercolour paper and oil pastels, here are OUR finished pieces!


    I loved how my girls chose to personalize their lollies - Sammy added a rabbit and a mantis and Krista drew a cat and a fish!  (My drawing is pretty run of the mill. ;). ). If you would like to try this art project or you are looking for some art ideas be sure to check out Create Art with ME

    Have a colourful weekend!

Jeanette

Tuesday, October 6, 2020

Hands On Rocks


Hey there!

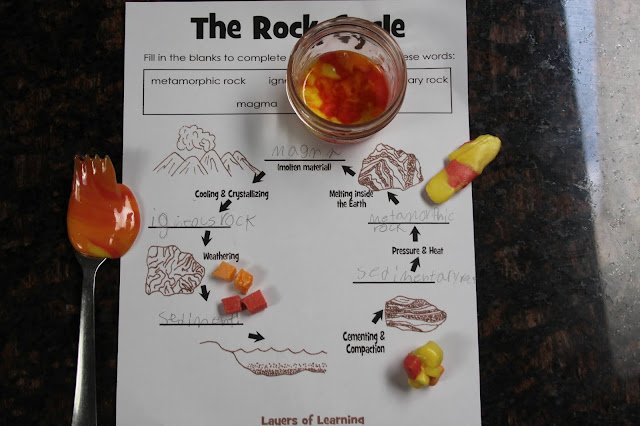
We have been learning all about the rock cycle here at home - who knew rocks were constantly being formed and broken down and reformed... its really quite interesting!  Here is a really simple "experiment" my girls and I did in the kitchen to help us visually remember each of the different types of rocks...

Its easy, its tasty and best of all it will cost you only two dollars!  Yup, head on over to Dollarama and grab yourselves a bag of Starburst candy and you're ROCKING!  (hahaha)

Okie-Dokie.. first you want to eat a few starburst.  Just get that out of the way.  

Next I used a sharp knife to cut a handful of starburst into quarters.  I then gave each of my little scientists a handful of these candy "sediments".

The first thing we did was use pressure from our hands to squeeze these 'rock sediments' into a mass... this formed our sedimentary rock.  You can still see bits of the original candy pieces, they've just become glued together to form a rock.

Next we made a fist around this sedimentary rock to transfer our body heat to the candy to make them soften.  When they were a wee bit squishy, we flattened them against the counter.  Krista needed a little bit of my muscle power to get hers to squish.  When the candy was smooth and the different colours less easily distinguished, we had ourselves Metamorphic rocks!


The final part of our experiment required my help with the use of the stove.  We set two small mason jars in a hot water bath and added our metamorphic rocks to the jars.  It took about half an hour for the candy rocks to melt and what we had was liquid-hot Magma!

We carefully took the Magma out of the jars and allowed it to cool on the counter.  The cooled magma was our Igneous rock!


Super fun and tasty way to study the rock cycle.. if I were to do it again, the only change I would make would be to wait until AFTER lunch to eat.. I mean make starburst rocks!  :)

Jeanette


Monday, October 5, 2020

Harvest Succotash

 Hello there!


    While learning about Canada's First Nations last month, we learned that the Iroquois people, being farmers often prepared a dish called Succotash.  Sammy and Krista wanted to know more about it so we took a little wander around Pinterest and sure enough found a youtube video of an 18th century recipe.  When the girls realized the dish highlighted the "three sisters" of   beans and squash... vegetables we had planted in our veggie patch, they were determined we must try it too!


Soooo... the first ingredient would be bear meat.  We do not have access to bear meat, but our friend in the youtube video assures us that a good cut of sirloin tip beef will work well and thankfully we still have a few cuts of grass fed beef at our disposal.


 It took a full afternoon for our succotash to simmer as we used the wood stove that we were burning on that cool damp 5 degree Friday.  The slower cook was well worth it though when we spooned into ourmouths the first delicious bite of garden fresh buttercup squash, beans, corn and meat.


    We enjoyed our succotash - it is much like a stew without the heavy stock.  


    We all agreed we would make it again!

    Bon Appetit!
    Jeanette